Craft Cove Blog: January 2018

Thursday, January 25, 2018

Which hook for the perfect circle


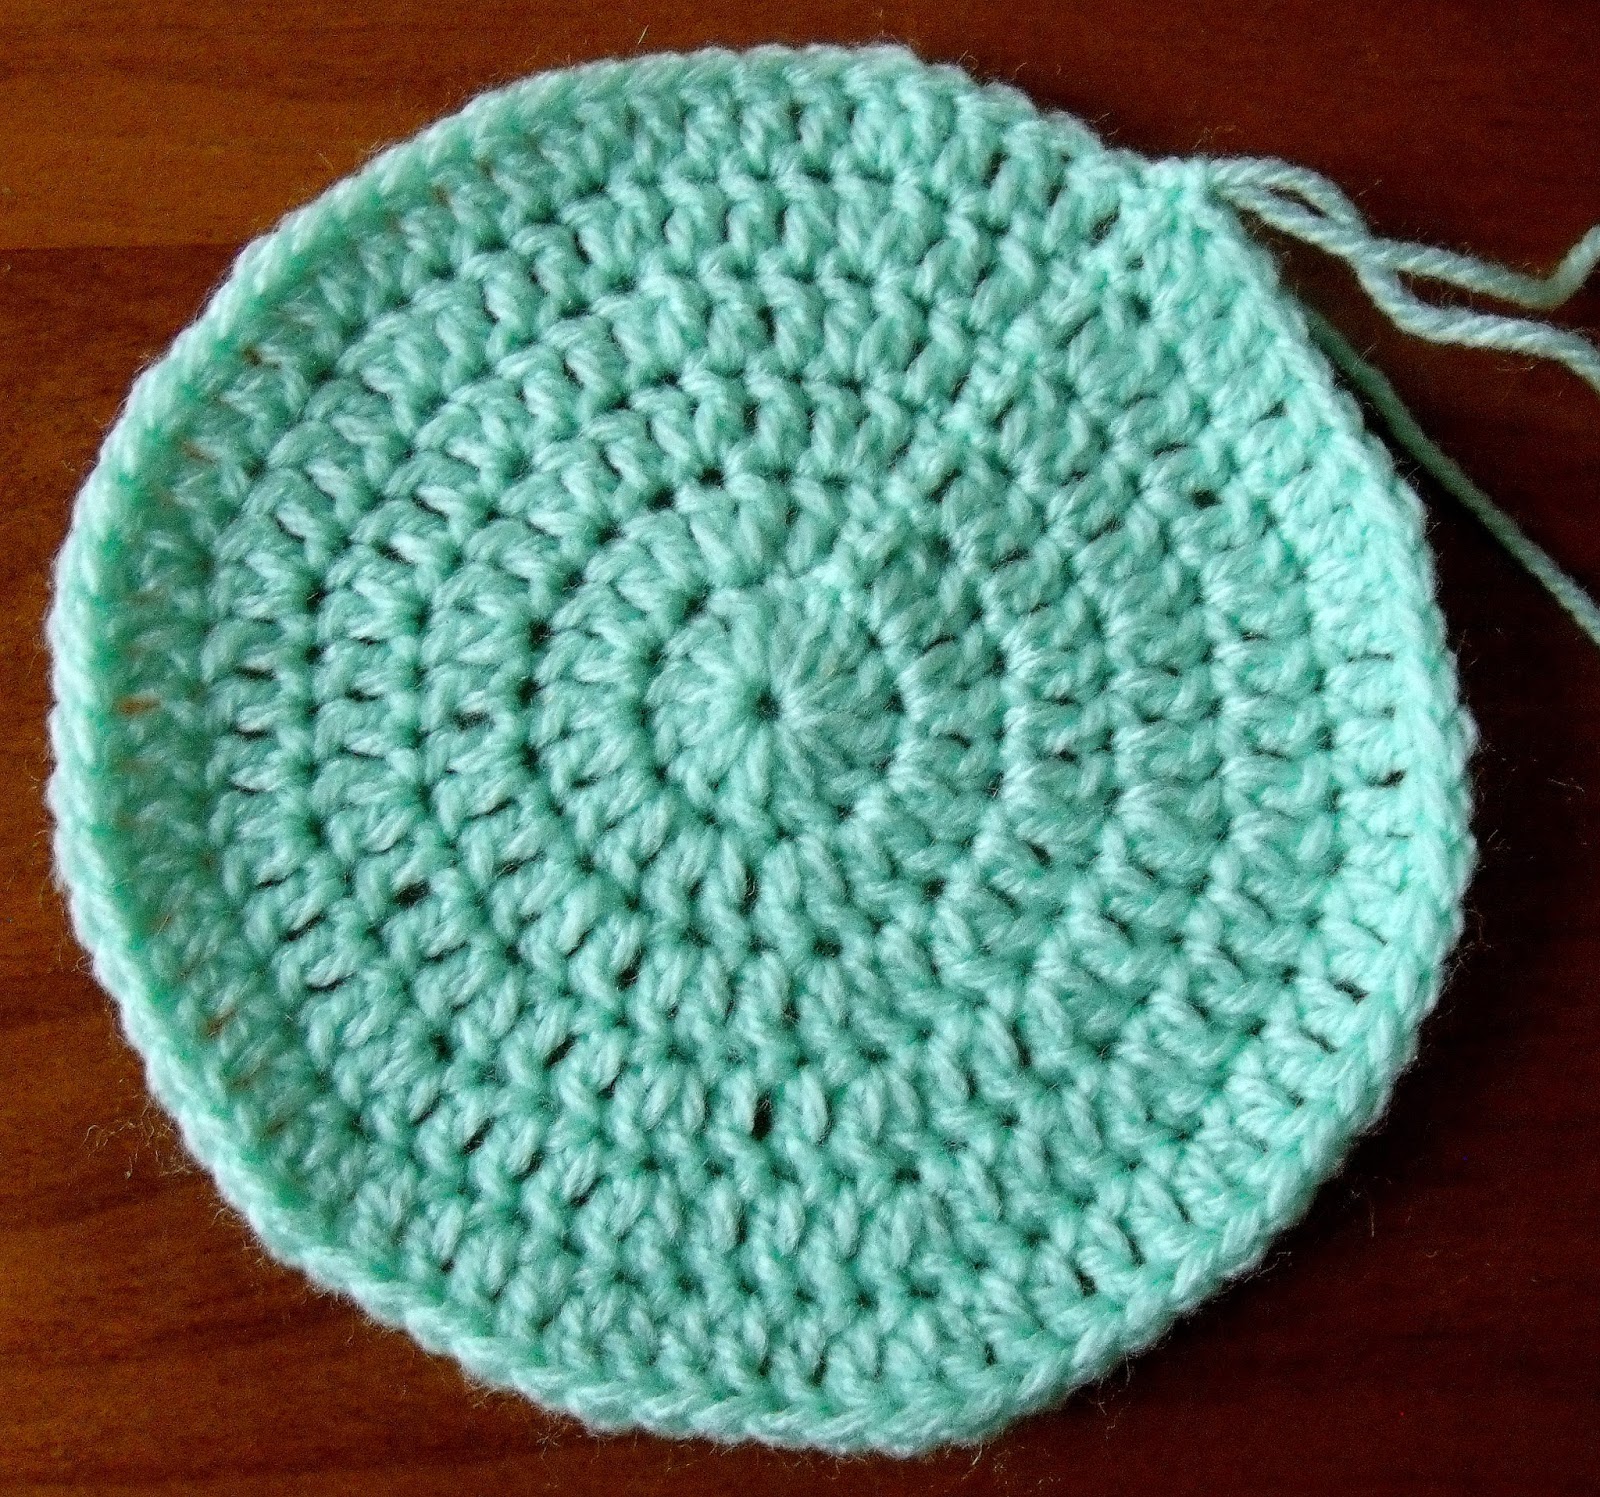
Above is the perfect flat circle. You can find the formula for it in the previous posts.


I've covered several things that can go wrong with the flat circle in previous posts.


This time I will talk about hook size

Sometimes the wrong sized hook can also have an effect of the flatness of the circle.


The above image shows the perfect flat circle worked with 8 ply yarn, and a 4 mm hook. It sits perfectly flat, and after 5 rows of  tr (dc US) it measures approximately 11 mm


In 
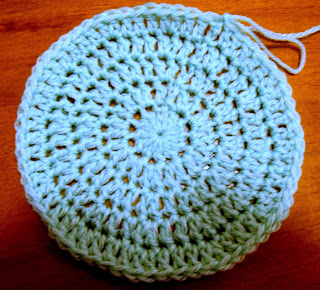
general, a too small hook will make the circle smaller.   Here the same yarn is used with a 2 mm hook. This time the circle measures 8.5 mm


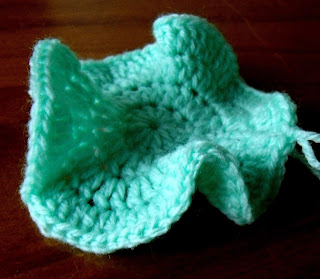
And a too large hook will make it larger. Here a 6 mm hook was used. It now measures 13.5 mm


But the wrong sized hook can have a slight effect on waving or curling as well.


The above image shows a slight bit of curling. This was the circle made with the 2 mm hook


Here is the circle made with the 6 mm hook. There is only a tiny bit of waving


If for any reason the circle is wavy, the general way to fix it is to make LESS increases, but if that is not possible, or too difficult, a SMALLER hook can be used.


On the other hand, if the circle is curling up, you need to use MORE increases, and again, if that is not possible, or too difficult, you could try a LARGER hook


Here is a chart of the most common recommended hooks to yarn weight

Australia
UK
USA
Hook Size (mm)
2 ply
2 ply
Lace
0.75 – 3.0 mm
3 ply
3 ply
Sock/ Fingering
2.25 – 3.5 mm
4 ply
4 ply
Fingering/Sports
2.5 – 3.5 mm
8 ply
Double Knitting
Light Worsted
3.5 – 4.5 mm
10 ply
Aran
Worsted
5.5 mm – 6.5 mm
16 ply
Bulky
Chunky
6.5 mm – 9.0 mm
20 ply
Chunky
Bulky
9.0 mm & above


More posts on making circles


Tuesday, January 23, 2018

Hexes Against Bullies


A couple of weeks ago I heard a terrible thing in the news.

An Australian girl committed suicide due to relentless online bullying.

I was shocked and horrified. So sad.


http://www.news.com.au/lifestyle/real-life/news-life/police-investigation-under-way-ahead-of-dollys-funeral/news-story/ebcbee59a67306acf292ed05a150577e


Sticks and stones can break my bones
But names can never hurt me


This is so not true. I've always known this personally. Words CAN hurt!  And VERY much


Then I was asked to join a facebook group of crocheters to create a hexagon, and have it joined to many other people's hexagons to create a lovely blanket to give to their family.

I thought it was such a lovely gesture. I was honoured to help


Then there was another story that shocked me to the core.


A teenage girl was assaulted viciously, she was tortured for 2 and a half hours while it was filmed.


http://www.theage.com.au/victoria/disabled-teenager-bashed-and-tortured-by-three-girls-after-being-lured-into-a-park-20180117-p4yyl0.html


This affected me so much because, while I know what it's like to be bullied, it was never physical.

This beaten girl was disabled. I know many disabled people, and used to work with them

This happened at Moe, a town in Victoria, Australia. The same town where I grew up

The girls doing the attack were 12 and 15!


I know these things have been happening since time began. But usually they happen when no-one else is around, and we don't get to see it.  We see the poor kid who was beaten up at school, he is black and blue with bruises. And we think, "poor boy, that is terrible"  Or they get told "Just ignore them"

This time it was there for us to see. And it was awful!


I decided I wanted to do something.

I decided I would also create a facebook group, where many people would come together and make hexagons. The hexagons would then be sent to me, where I would join them together into the blanket. Hexagons are a great shape to join together. And so much nicer than squares


The group started as Crochet for Kim. Then we made another blanket, with squares, for her sister. After that we decided to keep the group open to all crafters. It's now called Crochet and Crafts


Then I decided I may as well create the pattern for it too.

Of course I get carried away with patterns, and made it pretty fancy. So I decided I need to make an easier version too.


This worked perfectly. It would balance the fancy version, and the beginners can make it easily

And then I think I better create a chart too, for the visual learners. I find these tricky, but I did it. Then for lots of photos.


I have never created a pattern so quickly before. And I have never organised anything like this before.

A little overwhelming, but I have got a few helpers now. So far, so good

I can't wait to see it finished and Kim snuggled up in it. I hope it gives her comfort


Finally she received the blanket, and loved it


You can find the patterns here


Tuesday, January 16, 2018

When a circle is not a circle

One of the main ways of creating a corner is by working 2 sts (or more) in the same stitch, with 1 or 2 chains between.


This is why a circle can start to look like a 8 pointed shape or octagon. Each of the increase stitches can become like a corner. This seems to be especially true for sc.


To avoid this you can stagger the increases.

Eg: Do the first 3 rows as a normal circle. In the next row, work half the single sts first, work as normal, then work the other half


Row 1: Magic circle, 8 sc in circle. (8 stitches)

Row 2: 2 sc in each stitch around (16 stitches)

Row 3: *1 sc in next st, 2 sc in next st. Repeat from * to end (24 stitches)

Row 4: 1 sc in 1st st, 2 sc in next st, *1 sc in each of next 2 sts, 2 sc in next stitch. Repeat from * to last st , 1 sc in last st (32 stitches)

Row 5: *1 sc in each of next 3 sts, 2 sc in next stitch. Repeat from * to end (40 stitches)

Row 6: 1 sc in each of next 2 sts, 2 sc in next st, *1 sc in each of next 4 sts, 2 sc in next stitch. Repeat from * to second last st, 1 sc in each of last 2 sts (48 stitches)

Row 7: *1 sc in each of next 5 sts, 2 sc in next stitch. Repeat from * to end (56 stitches)

Row 8: 1 sc in each of next 3 sts, 2 sc in next st, *1 sc in each of next 6 sts, 2 sc in next stitch. Repeat from * to second last st, 1 sc in each of last 3 sts (64 stitches)


The next image shows the improvement when working the stitches staggered


More on posts making circles


Tuesday, January 9, 2018

When The Flat Circle Goes Wrong


When crocheting in a circle, if there were never any increases, the crochet would form a tube.


To make a flat circle, you need to increase stitches. See my other post for the formula:  http://craftcove.blogspot.com.au/2017/12/making-flat-circle.html


There is a formula to create a flat circle, but not all patterns use the formula, or use the formula the same way. Or your tension may be different. This may cause the circle to go wrong. 

Sometimes it's actually part of the pattern design, and nothing to worry about.


The main problems that can happen are waving or curling


WAVING


If your circle is all wavy like the images above. The problem is that the outer edges are increasing in size more than needed.


This can happen if there are too many increases in the rows.

The answer is to reduce the increase stitches in each row. You could also try a smaller hook in the outer rows to try to "tighten" it


The above image shows the waving from earlier on. Try to fix it before it goes too far


CURLING

Curling is when the edges curl up into a bowl. The problem here is that the outer edges are not being increased enough.


To fix this problem, you need to increase some stitches evenly along the rows.

Sometimes a larger hook can help if used along the outer edges


Next week I'll talk about others things that can go wrong with the circle


More posts on making circles


Add this

| More